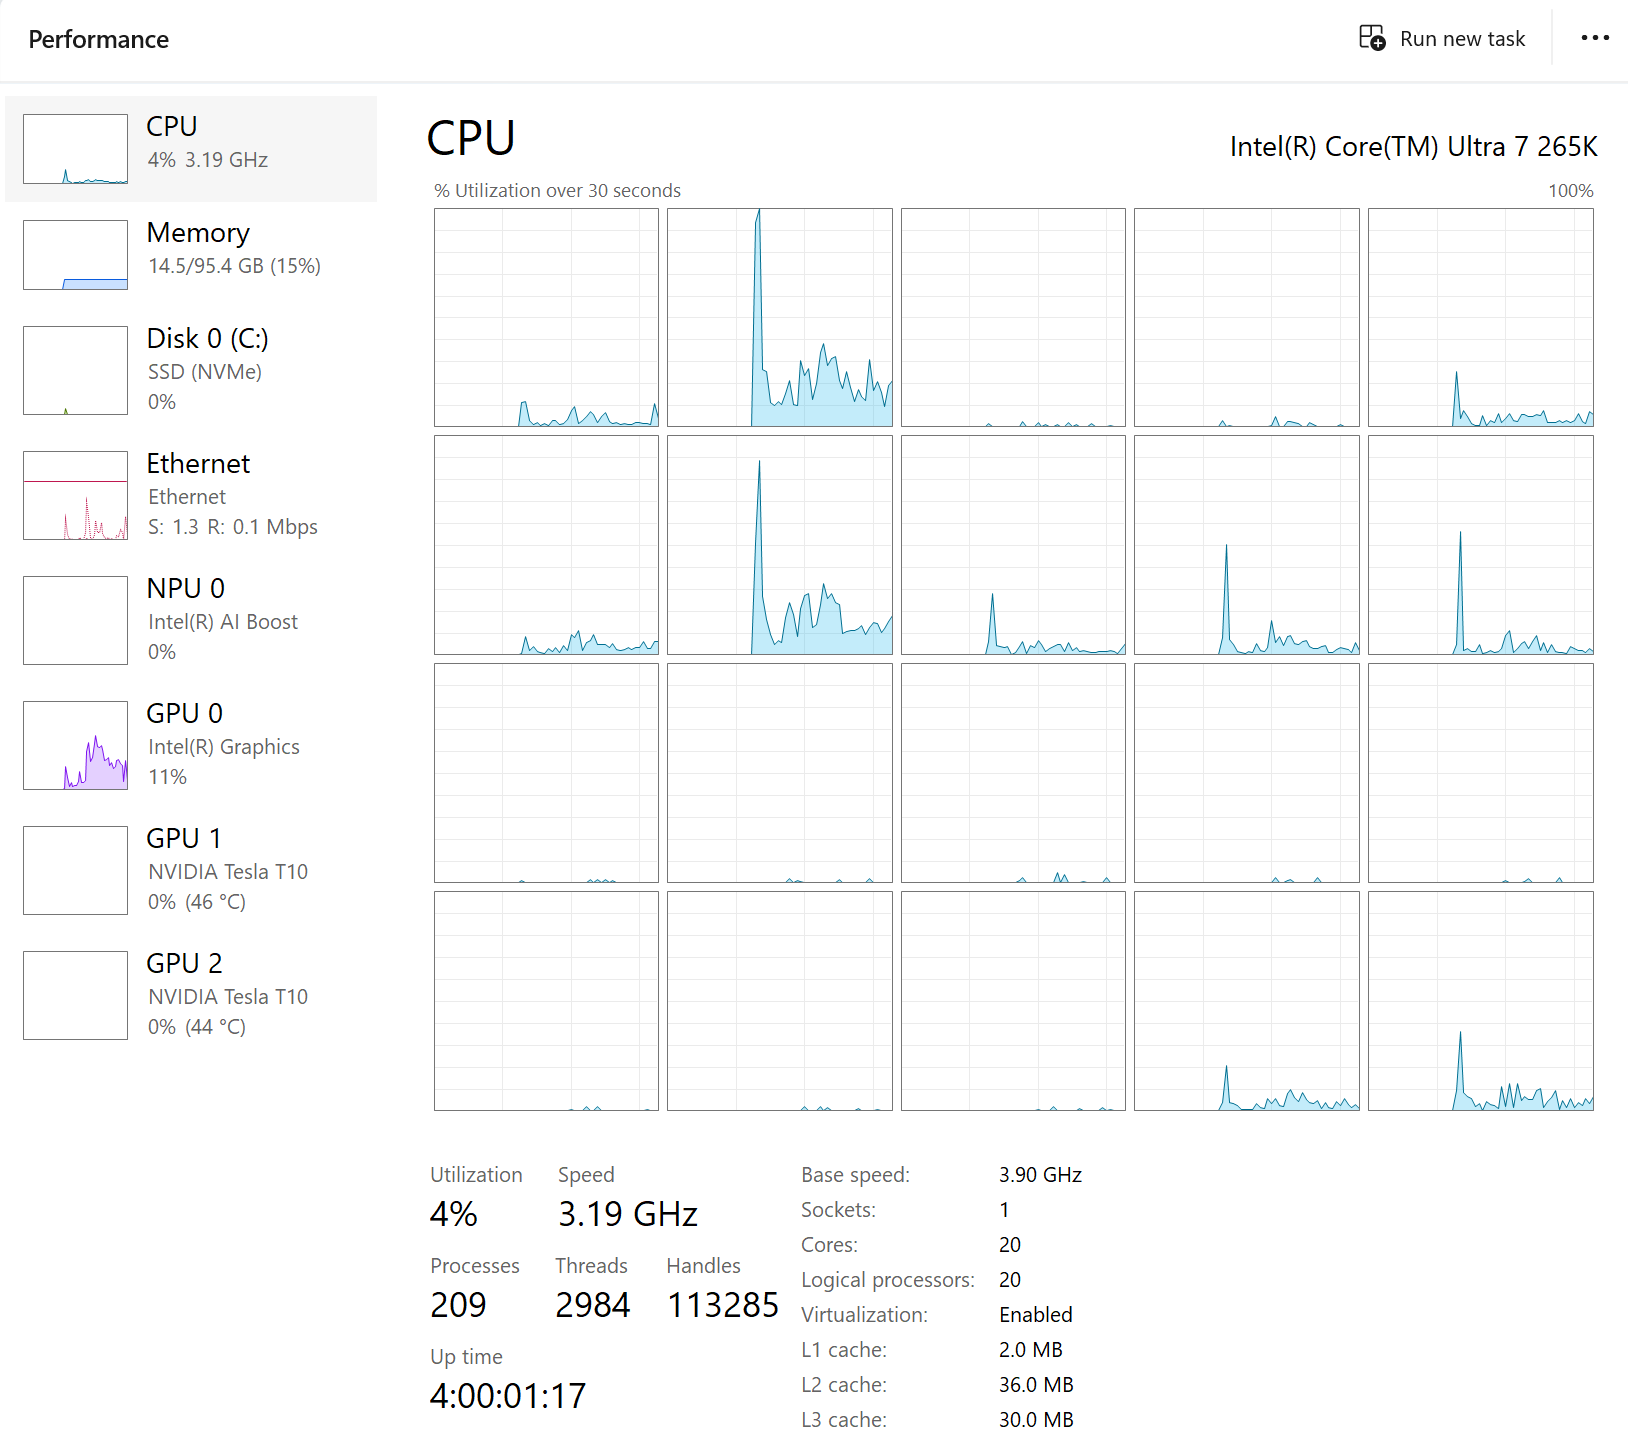
Perhaps because Intel realized their new products weren’t selling, the Core Ultra 200S series CPUs have seen significant price cuts. I took the opportunity to build a new PC with an Intel Core Ultra 7 265K, temporarily using the integrated graphics. While the Core Ultra 200S isn’t great for gaming performance (especially online games), for users like me with long uptime needs and a 4K monitor who don’t play online games, the 265K is quite suitable — it’s highly power-efficient at idle and very quiet with air cooling.
The motherboard is an MSI PRO Z890-A, which only provides one HDMI port for video output. Although this motherboard’s HDMI supports 4K 120Hz, due to bandwidth limitations, the color format downgrades from RGB to YUV420. This results in visible color fringing around small text. However, the motherboard has 2 × Thunderbolt 4 ports, and using a Thunderbolt/USB 4 cable to connect to the monitor allows for DP protocol output at 4K 144Hz with RGB (using DSC compression, but the difference is imperceptible to the naked eye).
Ultra 7 265K Stuttering and Solutions
After enjoying it for a day, I noticed something was off. The PC would freeze for a few seconds every few minutes, and in games, this manifested as a sudden drop in GPU load followed by recovery. This issue occurred whether using HDMI or DP (USB-C). Isn’t this kind of abnormal stuttering supposed to be AMD’s specialty?
After some investigation, I found the issue was with the integrated graphics driver. After updating the driver and rebooting, the problem disappeared.
However, the next day, the stuttering returned. Yes, Windows’ automatic updates had downgraded my driver, reinstalling the problematic version.
It’s said that the “driver crash” issue with AMD Radeon RX 9070 series GPUs is also caused by Windows Update downgrading drivers.
Microsoft is great at everything — except making hardware and writing software. Hmm?
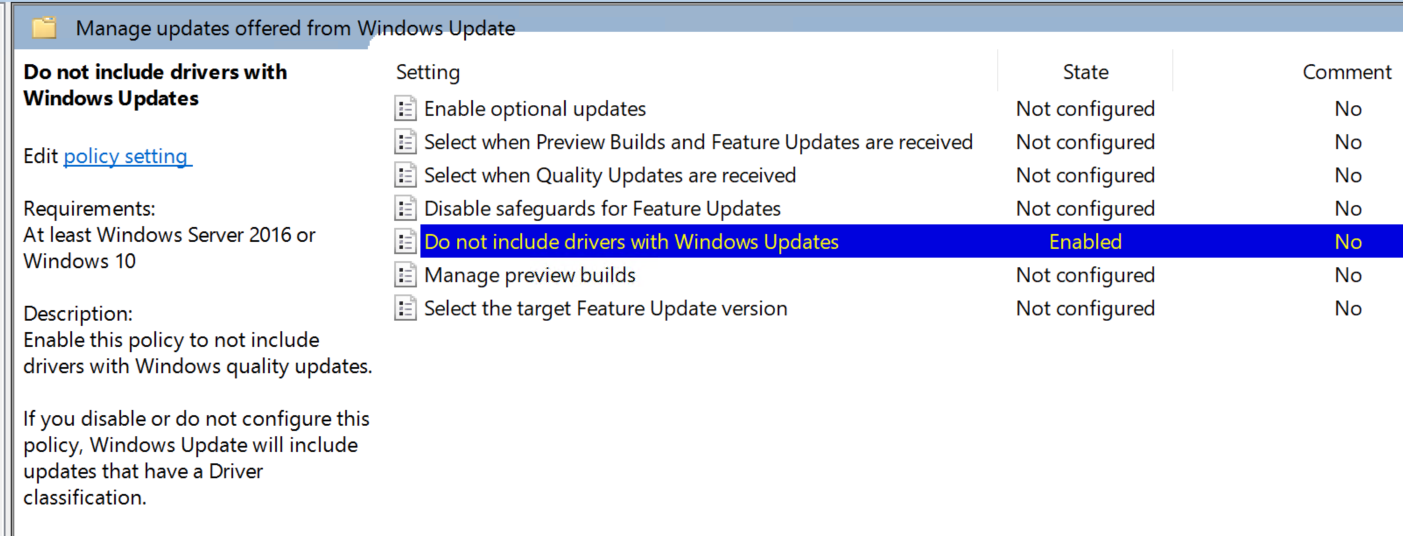
You can prevent Windows from automatically updating drivers by using Group Policy:
- Open Group Policy (Win+R -> type gpedit.msc)
- Computer Settings -> Administrative Templates -> Windows Components -> Windows Update -> Manage updates offered from Windows Update
- Select “Do not include drivers with Windows Updates” and set it to Enabled
If you can’t access Group Policy, you can modify the registry and reboot to achieve the same effect:
- Win + X -> Terminal (Admin)
- Paste and press Enter:
Set-ItemProperty -Path "HKLM:\SOFTWARE\Policies\Microsoft\Windows\WindowsUpdate" -Name "ExcludeWUDriversInQualityUpdate" -Value 1 -Type DWord
Note that Windows’ automatic driver updates also handle driver installation for new devices. If you later find that new devices don’t install drivers automatically, you can temporarily revert this change.
Integrated Graphics Video Codec Performance Issues and Solutions
2025-12-16 Update: MSI has released a new BIOS to resolve this issue (this link is for the MSI PRO Z890-A motherboard; please locate your motherboard’s support page to download).
Intel’s integrated graphics video codecs have always been industry-leading, and the Ultra 200S series adds AV1 encoding support. When gaming, using the integrated graphics QSV hardware encoder for streaming allows for high-quality streaming with minimal impact on game performance.
But strangely, on this PC, even when using Intel QSV’s fastest preset for H.264/AV1 encoding in OBS, it still reported encoder overload. Even more bizarre, when playing 4K videos in a browser using hardware decoding, the video dropped half its frames, and Task Manager showed 100% GPU usage.
After researching online, I found few people reporting similar issues (perhaps because not many use the Ultra 200S series!). Finally, a post mentioned that the issue might be related to memory overclocking. (Case 1 Case 2 Case 3)
I had only enabled XMP (5600 → 6400) without overclocking the CPU — could this really cause issues? After disabling XMP and rebooting twice, the codec performance returned to normal. At this point, using the highest quality preset for AV1 encoding in OBS allowed smooth 4K streaming.
All the cases reporting this issue seem to involve MSI motherboards. Not sure whose fault it is…
Gracefully Disabling Windows Automatic Updates
While we’re at it, you can also disable Windows’ infamous automatic updates without third-party software:
- Open Group Policy (Win+R -> type gpedit.msc)
- Computer Settings -> Administrative Templates -> Windows Components -> Windows Update -> Manage end user experience
- Select “Configure Automatic Updates” and set it to Disabled
- Note: It must be Disabled; other options may not respect your settings
This prevents your PC from automatically downloading updates and rebooting. Manual updates are still possible by checking for updates in system settings and rebooting as needed.
Windows updates are a bit like vaccines — even if you don’t update immediately, you’re somewhat protected. Microsoft’s forced updates for most users reduce hackers’ incentive to exploit vulnerabilities.
Windows 11 Pro?
Additionally, only Windows Pro and above can access the Group Policy Editor. Home edition users can upgrade to Pro by entering the Generic Key in Settings: VK7JG-NPHTM-C97JM-9MPGT-3V66T.
Note: This Generic Key is a universal key, not a pirated key. Using it doesn’t automatically activate your system; you still need to purchase a Windows Pro license.
I won’t recommend using HWID activation scripts to permanently activate your system and hardware here. For enterprise users, this poses legal risks; for individual users, it may violate Windows’ user agreement.
Coxxs
I thought that core ultra 200s had a jedec memory speed of 6400 , but u had to do xmp from 5600 to 6400, is it bcoz the ram had slower speeds or what. So now what is the igpu performance. My 12100 uhd 730igpu could play 8k60 videos very comfortably on ddr4 3200 with very few skip frames.